OpenAI’s billing just quietly became one of the most confusing setups in the AI developer space — and it is tripping up more people than ever. Budget limits that seem to stop working. 429 errors that appear even when you think you still have credits. New model names, new pricing tiers, and a lineup that now spans nine different models across four pricing bands. If you have ever stared at an “insufficient_quota” error at 11pm wondering why your app stopped working, this guide is for you.
This is the complete 2026 walkthrough: how to create your OpenAI Platform account, generate an API key, set up prepaid billing the right way, understand trust tiers and rate limits, configure spending limits so you never get a surprise bill, and plug everything into n8n using the official integration. We cover the billing model the way it actually works — not the simplified version — and we fix the most common errors before you hit them.
First: API Access vs ChatGPT Plus Are Not the Same Thing
This is the single most common source of confusion for new developers in 2026, and it is worth stating clearly upfront.
A ChatGPT Plus subscription ($20/month) gives you access to the ChatGPT web and mobile interface. It does not give you API access. It does not add API credits to your account. The two products share the same login credentials but have completely separate billing systems.
API access requires a separate payment setup at platform.openai.com. You can have a ChatGPT Plus subscription and zero API credits at the same time — and that is exactly the situation that causes most “I’m already paying for OpenAI, why doesn’t my API call work?” complaints.
Keep that distinction clear throughout everything that follows.
What You Need Before You Start
- A valid email address
- A phone number capable of receiving SMS (required for verification)
- A credit or debit card to fund your API usage (Visa and Mastercard international cards have the highest success rates)
That is everything. The signup itself takes about five minutes.
Step 1: Create Your OpenAI Platform Account
Navigate to:
https://platform.openai.com/signup
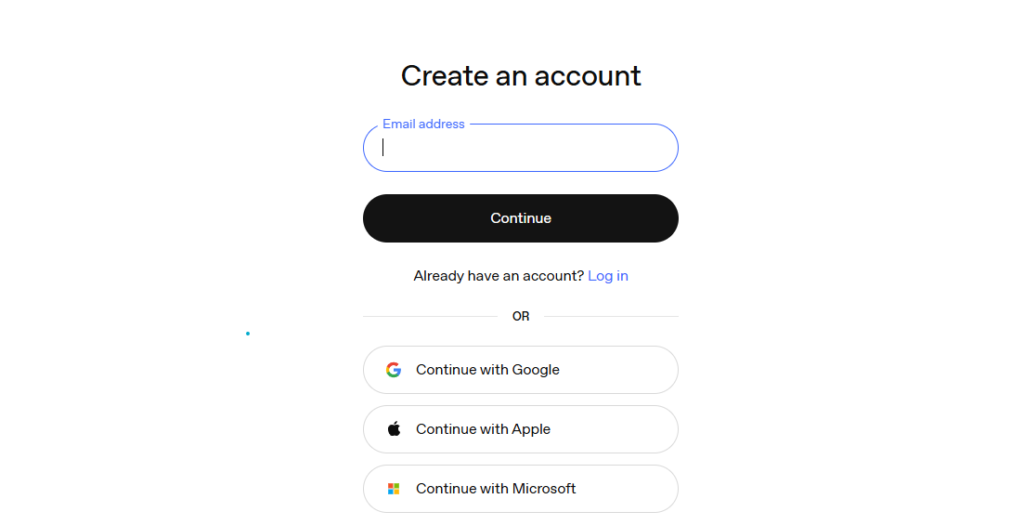
You can sign up using an email address, your Google account, or your Microsoft account. If you already have a ChatGPT account, you can use the same login — just remember that billing is separate.
After entering your details, OpenAI will send a verification email. Click the link to confirm, then complete phone number verification via SMS. Phone verification is mandatory and cannot be skipped. Enter the code you receive to activate the account.
Once done, you will land on the OpenAI Platform dashboard — the developer-facing side of OpenAI separate from the ChatGPT interface.
Step 2: Navigate to API Keys
From the platform dashboard:
- Click on your organization name or the Settings gear icon in the left sidebar
- Select “API keys” from the navigation menu (or go directly to platform.openai.com/api-keys)
- You will see the API key management page
On a fresh account, this will be empty. You have not generated any keys yet.
Step 3: Create Your API Key
On the API Keys page:
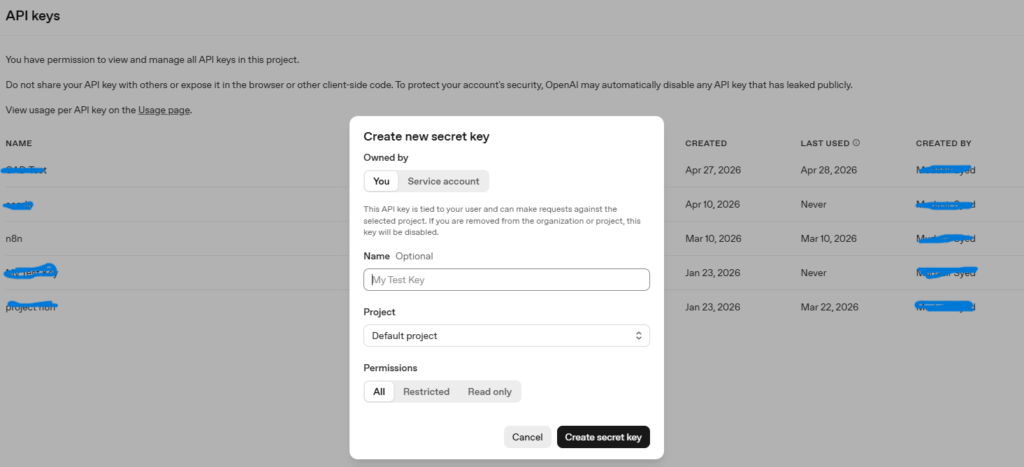
- Click “Create new secret key”
- Give the key a descriptive name — use something like “n8n-prod”, “cursor-dev”, or “project-name-env” so you can identify it later
- Optionally assign it to a specific project (useful if you are managing multiple projects with separate usage tracking)
- Click “Create secret key”
Your API key will appear exactly once. Copy it immediately and store it somewhere secure — a password manager, an environment variable file, or your team’s secrets vault. OpenAI will not display the full key again after you close this dialog. If you lose it, you must generate a new one and update every integration using the old key.
Your key will start with “sk-” followed by a long string of characters.
Step 5: Add a Payment Method and Purchase Credits
To add billing:
- Go to Settings in the platform dashboard
- Click “Billing” in the left navigation (or navigate directly to platform.openai.com/settings/organization/billing/overview)
- Click “Add payment method”
- Enter your credit or debit card details
- Once the card is saved, click “Add to balance” or “Buy credits”
- Choose an initial amount — $5 minimum, $10 is the default starting suggestion
- Confirm the purchase
Your balance will update within a couple of minutes. There may be a temporary authorization charge on your card during this process, which is normal and is typically reversed automatically.
Once your balance is funded, you are ready to make API calls.
Step 6: Set Up Auto-Recharge (Do This Before You Build Anything)
Auto-recharge is one of the most important settings you can configure and one of the most commonly skipped — until your application goes down at the worst possible moment because your credits ran out.
Auto-recharge automatically adds a set amount of credits to your account when your balance drops below a threshold you define. To set it up:
- In the Billing section, find the Auto-recharge settings
- Toggle auto-recharge on
- Set the threshold amount — the balance level at which a recharge triggers (for example, recharge when balance drops below $5)
- Set the recharge amount — how much to add when triggered (minimum $5)
With auto-recharge on, your application continues running without manual intervention. Without it, you will eventually hit zero and experience service interruptions.
The minimum auto-recharge amount is $5. The maximum is determined by your trust tier (covered below).
Step 7: Set Spending Limits to Protect Your Budget
OpenAI provides budget controls that cap how much your API usage can cost in a given period. This is critical for development environments, personal projects, or any situation where unexpected usage spikes could cause real financial damage.
To configure limits:
- Go to Settings in the dashboard
- Click “Limits”
- Set a Monthly budget — this is a hard cap; when your spending reaches this amount, API calls return an error until the next billing period
- Set a Notification threshold — an email alert sent when your spending reaches a specific amount, giving you advance warning before hitting the hard cap
For individual developers getting started, a $10 to $25 monthly budget with a $5 notification threshold is a reasonable starting point. For small teams, $100 to $500 with a proportional notification threshold. For production applications, set the limit based on your expected usage plus a 30 to 50% buffer for variance.
One important nuance: there may be a brief delay in OpenAI’s systems enforcing the cut-off after you reach your limit. Small amounts of excess usage can occasionally appear as a negative credit balance, which gets deducted from your next credit purchase.
Understanding OpenAI Trust Tiers and Rate Limits in 2026
This is where a lot of developers hit unexpected friction. OpenAI does not give every account the same rate limits. Access and limits scale with a trust tier system based on your cumulative spend.
The tier structure works approximately like this:
Free tier (no spend): Very limited rate limits. Access to lighter models only. Enough for basic prototyping and testing but not production.
Tier 1 (at least $5 spent): All models unlocked including GPT-5.4 and the o-series reasoning models. Moderate rate limits — suitable for development and testing. 500 requests per minute for most models.
Tier 2 ($50+ cumulative spend): Higher throughput. Rate limits increase significantly. Most development teams operate comfortably at this level.
Tier 3 and above ($250+ and beyond): Production-grade rate limits. Required for high-volume applications.
Important: Tier upgrades are automatic — you do not request them. But they require both the spending threshold and a waiting period. You cannot jump from Free to Tier 3 in a single day by loading $500. The system builds trust over time alongside cumulative spend.
This is why some developers find their applications hitting rate limit errors immediately after launch: they never moved beyond Tier 1. The solution is gradual credit spending during development to build tier history before going to production.
OpenAI API Pricing in 2026: Which Model Should You Use?
OpenAI’s 2026 lineup is significantly more complex than previous years. Here is a practical overview to help you choose the right model for your use case and budget.
GPT-4.1 Nano is currently the cheapest capable model at $0.10 per million input tokens and $0.40 per million output tokens. Excellent for classification, routing, extraction, and high-volume simple tasks.
GPT-4o Mini costs $0.15 per million input tokens and $0.60 per million output tokens. The classic budget option — still solid for general tasks.
GPT-5.4 Nano is $0.20 per million input tokens and $1.25 per million output tokens. Good middle ground for everyday workloads.
GPT-4o is $2.50 per million input tokens and $10.00 per million output tokens. Previous-generation flagship, still widely used for existing integrations.
GPT-5.4 is $2.50 per million input tokens and $15.00 per million output tokens. The current flagship general-purpose model with a 270K token context window. Best for complex reasoning and nuanced tasks.
o3 is $2.00 per million input tokens and $8.00 per million output tokens. The reasoning specialist — built for math, logic, multi-step analysis, and code debugging. At this price point, o3 is roughly 7.5x cheaper than o1 on input.
Two cost-reduction tools that apply across all models:
Batch API: Submit requests for asynchronous processing completed within 24 hours. All models get a 50% discount. If your workload is not time-sensitive, this halves your bill.
Prompt caching: OpenAI automatically caches repeated prefixes in your prompts. Cached input tokens cost 90% less. If your system prompt is consistent across requests, subsequent calls where that prefix hits the cache cost dramatically less.
Always verify current pricing at the official source before budgeting: https://openai.com/api/pricing/
How to Add Your OpenAI API Key in n8n
n8n has official native support for OpenAI through dedicated credential and node integrations. Here is how to set up both.
Setting Up OpenAI Credentials in n8n
According to the official n8n documentation at https://docs.n8n.io/integrations/builtin/credentials/openai/, OpenAI credentials in n8n require:
- Your OpenAI API key (generated in the steps above)
- Optionally, your Organization ID (found in your OpenAI platform settings under Settings > Organization)
To add credentials:
- In your n8n instance, open the Credentials section
- Click “Add Credential”
- Search for “OpenAI” and select it
- Paste your API key into the API Key field
- Optionally add your Organization ID if you are working within a specific organization
- Save the credential
Using the OpenAI Node in n8n
The OpenAI node (n8n-nodes-langchain.openai) is documented at https://docs.n8n.io/integrations/builtin/app-nodes/n8n-nodes-langchain.openai/ and supports a wide range of operations including:
- Text generation (Chat Completions)
- Assistant operations
- Audio transcription and text-to-speech
- Image generation
- File operations
To use it in a workflow:
- Add the OpenAI node to your canvas
- Select your saved OpenAI credentials
- Choose your operation (for most AI agent workflows, this is “Message a Model” or “Chat”)
- Select your model — use gpt-4.1-nano for cost-effective workflows or gpt-5.4 for complex tasks
- Configure your prompt and parameters
For AI Agent workflows in n8n specifically, use the OpenAI Chat Model sub-node as the language model input for AI Agent and chain nodes. This integrates with n8n’s full LangChain-based AI infrastructure including memory, tools, and vector stores.
Common Errors and Exactly How to Fix Them
These are the errors developers are hitting most frequently in 2026, with the actual fixes.
“You exceeded your current quota” (Error: insufficient_quota)
This is the most common API error. It means one of: your credit balance is zero, you have hit your monthly spending limit, or — for brand new accounts — you have not yet added any credits at all. Go to platform.openai.com/settings/organization/billing/overview, check your balance, and add credits or increase your limit.
401 Unauthorized
Your API key is wrong, was copied with extra whitespace, or has been deleted. Verify the key in your code, check that the Authorization header is formatted as “Authorization: Bearer sk-yourkey”, and if needed, generate a new key from the API Keys section.
429 Too Many Requests (Rate Limit)
You have exceeded your rate limit for the current trust tier. Short-term fix: implement exponential backoff retry logic in your application. Medium-term fix: increase your cumulative spend to move to a higher tier. For immediate production needs, reduce requests per minute or switch to a cheaper model that may have separate and less-constrained rate limits.
429 with “insufficient_quota” message
Despite the 429 status code, this is actually a billing error, not a rate limit. Your balance or monthly budget has been reached. Refill your credits or increase your monthly budget cap.
API calls working but much slower than expected
If you are on the Free tier or Tier 1, you may be hitting lower priority processing during peak hours. Moving to Tier 2+ generally resolves latency issues on the standard processing tier. The Flex tier (lower cost, slower) intentionally deprioritizes requests — check which service tier your calls are using.
OpenAI API Key Security Best Practices
Your API key controls access to your billing account and can accumulate costs if exposed. Treat it as seriously as a password or a credit card number.
Never hardcode your API key directly in source code. Use environment variables such as OPENAI_API_KEY and load them through your application’s configuration system.
Never commit your API key to a Git repository. Even private repositories have breach histories. Add .env files to your .gitignore immediately. Leaked API keys are one of the most common sources of unexpected charges.
Create separate keys for separate environments. Use different keys for development, staging, and production. If one environment is compromised, you revoke that key without affecting others.
Set per-project keys where possible. The OpenAI platform allows you to assign keys to specific projects with separate usage tracking, making it easy to identify which project is generating which costs.
Monitor your usage dashboard regularly. Unexpected spikes in the usage graphs at platform.openai.com/settings/organization/usage are often the first sign of a leaked or compromised key.
If you suspect a key has been exposed: delete it immediately from the API Keys section, generate a replacement, and update your integrations. Check your billing dashboard for any unauthorized usage and contact OpenAI support if you see charges that were not yours.
Quick Reference: Everything You Need
Platform URL: https://platform.openai.com/signup
API Keys: https://platform.openai.com/api-keys
Billing: https://platform.openai.com/settings/organization/billing/overview
Usage Dashboard: https://platform.openai.com/settings/organization/usage
Spending Limits: https://platform.openai.com/settings/organization/limits
Official Pricing: https://openai.com/api/pricing/
n8n OpenAI Credentials Docs: https://docs.n8n.io/integrations/builtin/credentials/openai/
n8n OpenAI Node Docs: https://docs.n8n.io/integrations/builtin/app-nodes/n8n-nodes-langchain.openai/
OpenAI Developer Docs: https://developers.openai.com/api/docs/concepts
Minimum billing top-up: $5
Auto-recharge minimum: $5
Cheapest current model: GPT-4.1 Nano ($0.10/M input)
Batch API discount: 50% off all models
Prompt caching discount: 90% off cached input tokens
Final Thoughts
Getting an OpenAI API key is genuinely straightforward once you understand the two things that trip most people up: billing is completely separate from ChatGPT Plus, and rate limits are not static — they scale with your trust tier based on cumulative spend.
The steps are simple: sign up at platform.openai.com, generate a key, add $5 minimum in prepaid credits, set up auto-recharge to prevent service interruptions, configure a monthly spending limit so you never get a surprise bill, and set a notification threshold so you get advance warning before hitting that limit.
For model selection, most new projects should start with GPT-4.1 Nano or GPT-4o Mini for cost-sensitive tasks, then graduate to GPT-5.4 or o3 as the complexity of your use case justifies it. Use the Batch API for any workload that is not real-time, and let prompt caching work for you by keeping system prompts consistent.
If you are using n8n, the native OpenAI credentials and node handle the authentication cleanly — add your key once, and it flows through to every OpenAI-powered workflow you build.
The infrastructure is solid. The billing is manageable when you understand it. Now build something.

please follow https://aigeneratedapps.com/how-to-get-openai-api-key-billing-setup/ blog